
This article shows you how to deploy a Robo-Advisor for either live-testing or real-trading, on ALGOGENE platform.

What is a Robo-Advisor?
ALGOGENE Robo-Advisor is a usage scenario for semi-automatic trading. With a Robo-Advisor, it could save your time in continuous monitoring the financial markets and tedious steps of manual trade inputs.
- When there are trading signals generated, the investment bot will automatically push the messages to you via
- You can then choose to accept or ignore the trading signal by replying the message in your app.
- For trade acceptance, the trade signal will then be executed to your personal broker accounts.
The overall workflow is summarized in this diagram.

What are the benefits of Robo-Advisor over Robo-Trader?
- Robo-Trader is for fully automatic trading. Once a trading signal appears, it will be directly executed to your securities account.
- Robo-Advisor provides a higher level of user control. You will need to "approve" the trade before the bot executes for you.
What are the disadvantages of Robo-Advisor?
Here are some key notes for your consideration.
- Trading Frequency: it might be annoying to keep receiving trading signals from a high-frequent trading bot.
- Trading Period: for example, for a US market focused trading bot, a Hong Kong resident would probably miss out some trading signals at your bed time.
- Response Time: you may also miss out some trading opportunities for unable to read and reply the trading message on time, due to busy work, exams, meeting, out-of-battery phone, etc
Who are the providers of Robo-Advisors?
The Robo-Advisors could either be
- DIY - developed by yourself, or
- Subscribed from a third-party algo providers in ALGOGENE Marketplace
Prerequisites
For real-trading, you are required to link up your ALGOGENE account with a securities account from our supported brokers. Please refer to these posts for the setup if you haven't done so.
- Connect Trading Account with Alpaca
- Connect Trading Account with Binance
- Connect Trading Account with BingX
- Connect Trading Account with Bitget
- Connect Trading Account with Bybit
- Connect Trading Account with Eqonex
- Connect Trading Account with Exness
- Connect Trading Account with Interactive Brokers
- Connect Trading Account with IG
- Guideline to use ALGOGENE DLL in MetaTrader
- Connect Trading Account with MEXC
- Connect Trading Account with OANDA
- Connect Trading Account with OKX
- Connect Trading Account with Tickmill
- Guideline to setup Incoming Webhook Signal with TradingView
- Connect Trading Account with WhaleFin
For live-testing, you can either use ALGOGENE for the paper-trading (by default), or connect to demo accounts provided by above brokers.
System Configuration for Robo-Advisor
Suppose you have connected a broker account following the steps in above articles, Robo-Advisor can now be enabled as follows.
- Login ALGOGENE portal
- Go to [Settings], then go to [Live Demo] or [Real Trade] depending on your case
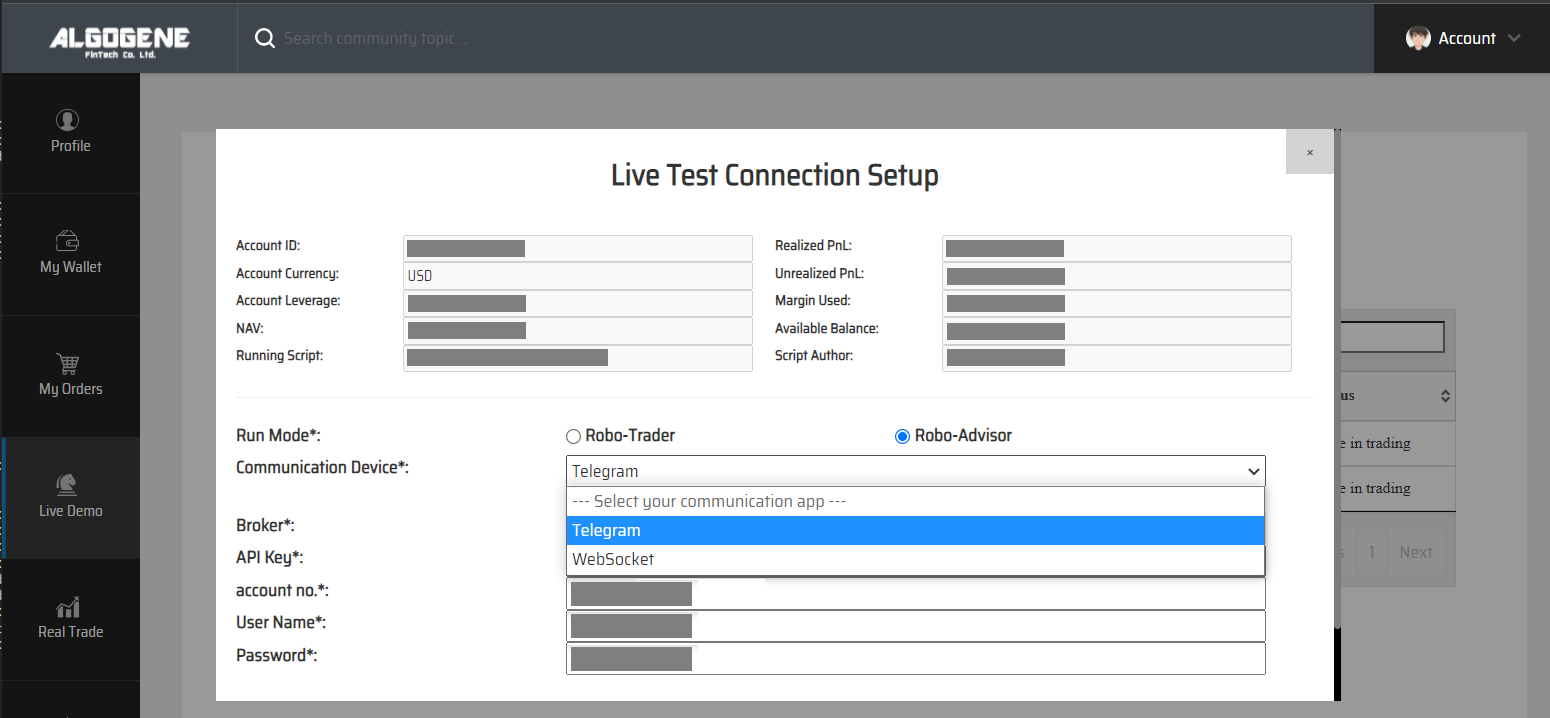
- Select your connected account, and click icon "Account Config"
- In [Run Mode], choose "Robo-Advisor"
- In [Communication Device], choose your desired method to receive the trading signal
1. How to deploy DIY Robo-Advisor?
(a) Deploy from a backtested script
For DIY Robo-Advisor, it is highly recommended to backtest your strategy before go-live. It does not only allow you to assess how a strategy would have performed in the past, but also to discover potential logical bugs in your script.
The deployment from backtest is very simple which requires NO code changes. Here are the steps to deploy a backtest script:
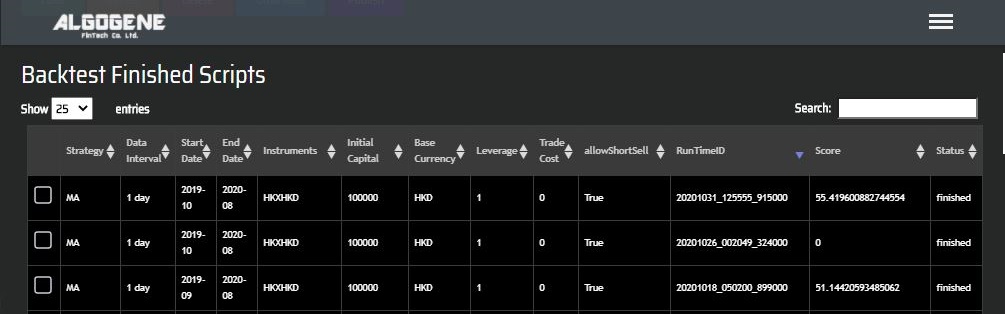
- Suppose you've already backtested some strategies on ALGOGENE, where you can check it from [My History] as follows.
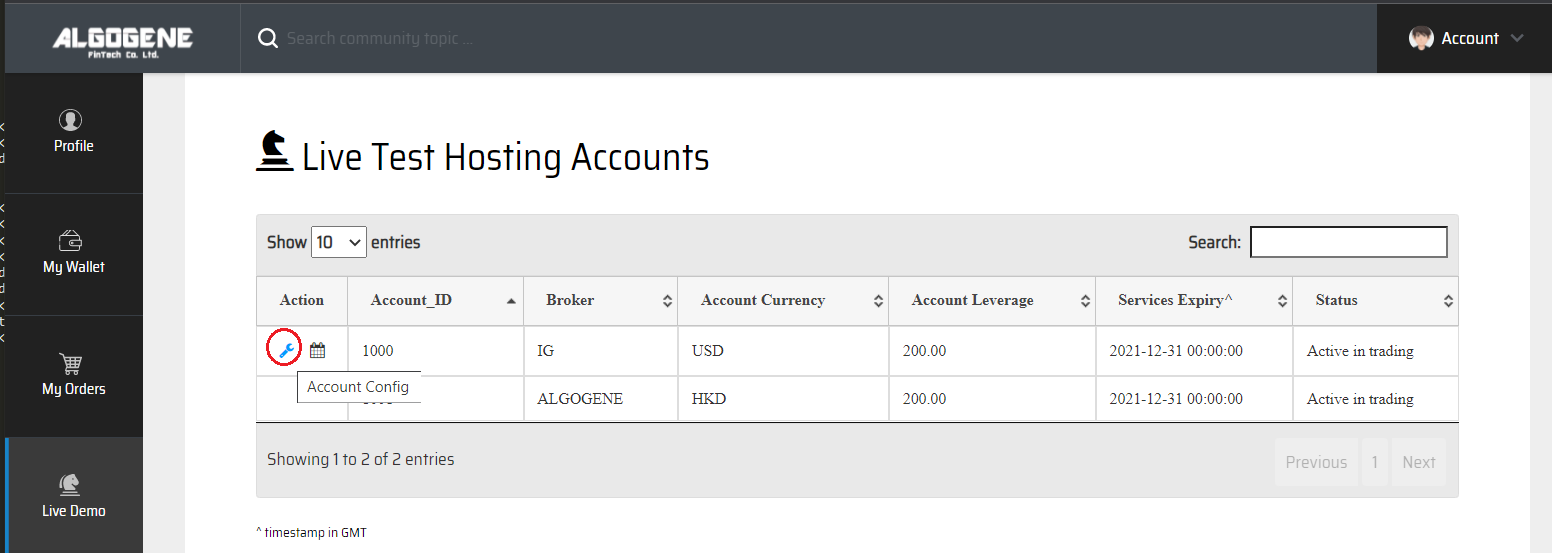
- Now, go to [Settings],
- then [Live Test Hosting Accounts] for live-test deployment, or
- [Real Trade Hosting Accounts] for real-trade deployment
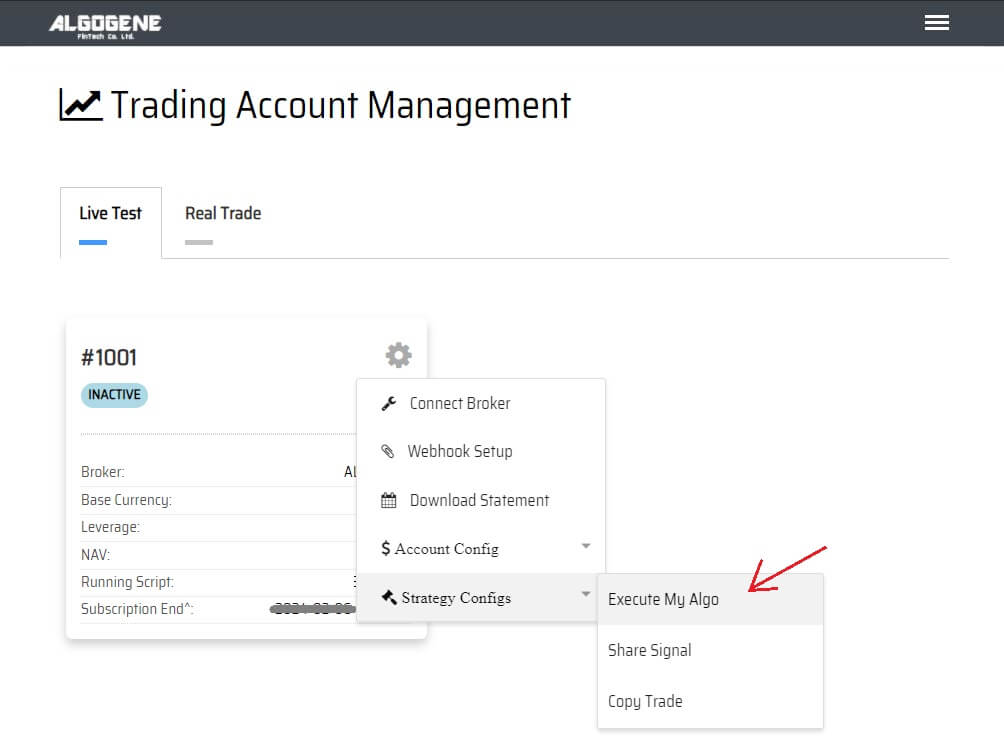
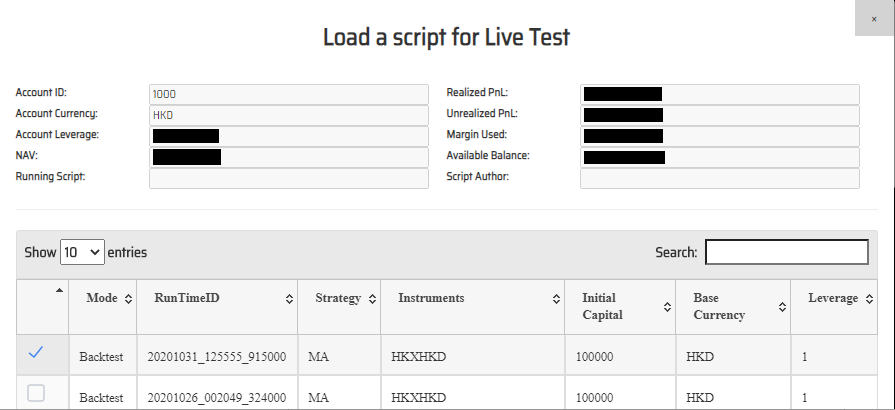
- Select your broker-linked account, and click button "Execute Algo"
- Choose your desired backtest script, and click "Execute" button
- Verify your action
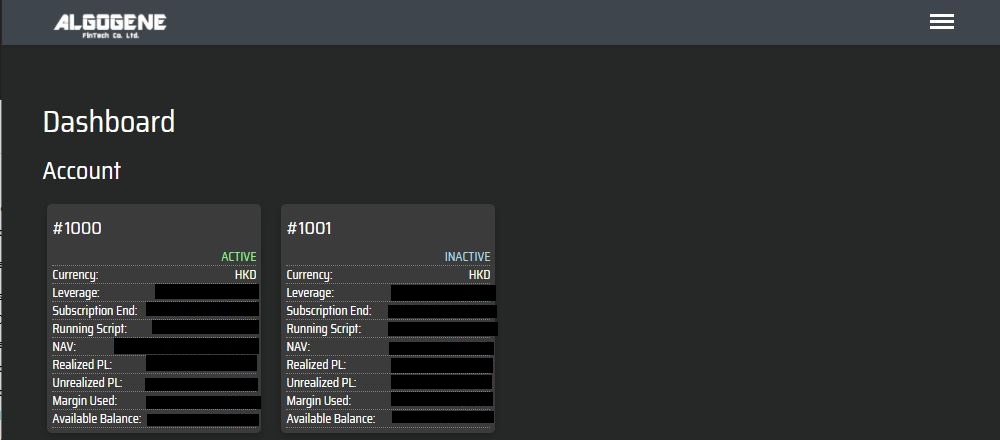
- After passing the verification step, go to [Live Test] or [Real Trade] depending on your case. Your Robo-Advisor is active now!

(b) Deploy from livetest/ real-trade interface
It is feasible for you to write your script entirely from livetest/ real-trade interface. However, we don't recommend you to do so due to potential risk of logic errors. Instead, it will be the case when you want to fine-tune your strategy after deploying from a backtest script. The scripting language and framework are exactly the same to what you have done in backtesting. Here are the steps:
- Go to [Live Test] or [Real Trade] depending on your case
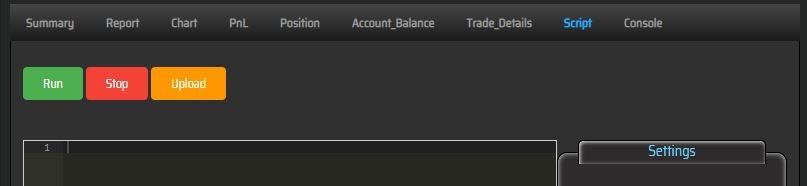
- Go to [Account Details], select your linked account and click "Stop Algo"
- Now, go to [Account Details] > [Script], re-write or update your trading logics, then press button "Run" (you can refer to Tech Doc for ALGOGENE Web APIs)

(c) Deploy through ALGOGENE REST API
If you want to host your strategy locally rather than on ALGOGENE's cloud, you can also utilize ALGOGENE REST API. Please refer to the REST API Doc for the implementation details. The workflows are summarized below:
- Use "Account Configuration" endpoint to link up ALGOGENE with your broker accounts
- Use "Orders" endpoints to send orders
- Other endpoints to query market data, account balance, inventory, etc
All your algo transaction details executed via REST API will also be real-time synchronized on ALGOGENE's web portal. You can check it from [Live Test] or [Real Trade].
2. How to deploy a subscribed Robo-Advisor?
- Explore available Robo-Traders from ALGOGENE Marketplace
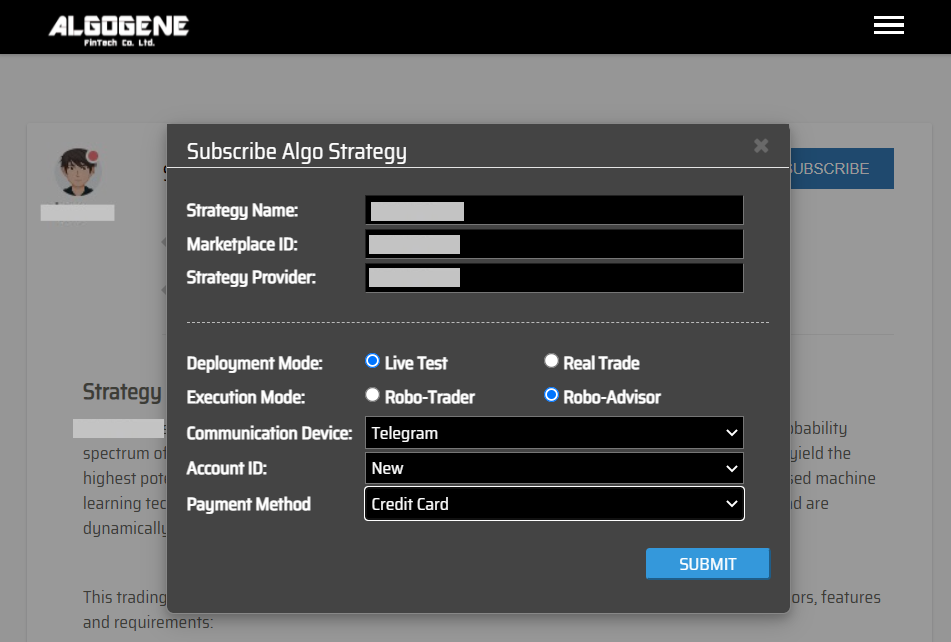
- Choose a desired trading bot, click "SUBSCRIBE"
- In "Execution Mode", choose "Robo-Advisor"
- In "Communication Device", choose your desired method to receive trading signal
- Also, select your desired "Deployment Mode" and "Account", then click "SUBMIT"
Demo Video
Happy Trading! :)
