
Following the article Guideline to backtest with custom datasets, we learnt how to upload custom data to the system for backtest analysis. This post will further discuss how to upload data to the cloud data directory via API.
This feature is particularly useful to these usage scenarios:
- Massive data upload programmatically
- Real-time external data feed for live trading
Data Preparation
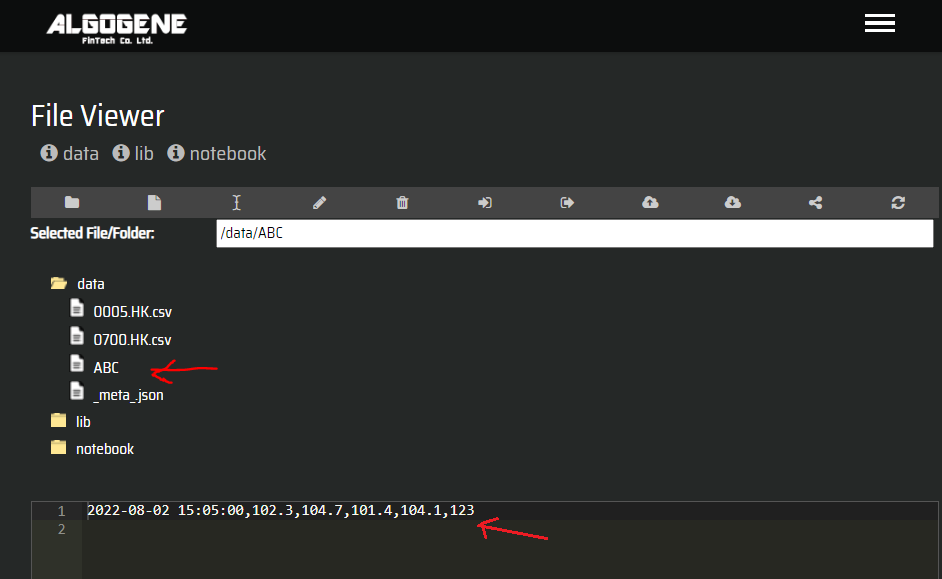
Suppose we have our own data source and want to live feed the data to a file "ABC". Let's say a particular trading record contains the following information.
- Timestamp: 2022-08-02 15:05:00
- Open price: 102.3
- High price: 104.7
- Low price: 101.4
- Close price: 104.1
- Volume: 123
Technical Specification
Endpoint:
- https://algogene.com/rest/v1/upload_data
Parameters:
- user: your ALGOGENE user id
- api_key: your API key
- file: specify the file to store your data
- mode: 'a' for data append; 'w' for data overwrite to your specified file
- msg: the data message to write to the file
Example (Python)
We can post data from a local machine to the cloud data directory as follows:
1 2 3 4 5 6 7 8 9 10 11 12 13 | import requests url = 'https://algogene.com/rest/v1/upload_data' headers = {'Content-Type': 'application/json'} params = { 'user':"xxx", 'api_key':'xxx', 'file':'ABC', 'mode':'a', 'msg': '2022-08-02 15:05:00,102.3,104.7,101.4,104.1,123' } res = requests.post(url, data=json.dumps(params), headers=headers) print(res.text) |
Upon successful data upload, you will receive this message.
1 2 3 4 | {
"res": "Successful data upload!",
"status": true
}
|
Now, we can check the details under [My History] > [Custom File Viewer]. The system will create the "ABC" file for us if it doesn't exist.
Update meta data
Similar to the previous post, we need to update the file "_meta_.json" to let the system know how to process our data.
In above example, our file contains 6 columns separated by comma.
| Column Index | Column Name | Data Type |
|---|---|---|
| 0 | Timestamp | in format of YYYY-MM-DD HH:MM:SS |
| 1 | Open | float |
| 2 | High | float |
| 3 | Low | float |
| 4 | Close | float |
| 5 | Volume | integer |
We can define the meta data as follows:

1 2 3 4 5 6 7 8 9 10 11 12 13 14 15 16 17 | {
"ABC": {
"file": "ABC",
"file_delimiter": ",",
"period_start": "2022-08-01",
"period_end": "2099-12-31",
"settleCurrency": "USD",
"contractSize": 1,
"fmt_time": "%Y-%m-%d %H:%M:%S",
"col_time": 0,
"col_open": 1,
"col_high": 2,
"col_low": 3,
"col_close": 4,
"col_volume": 5
}
}
|
How to use custom data for Live Trading?
As long as the configuration is setup properly, we will then be able to get the custom real-time data stream in live-testing or real-trading environment.
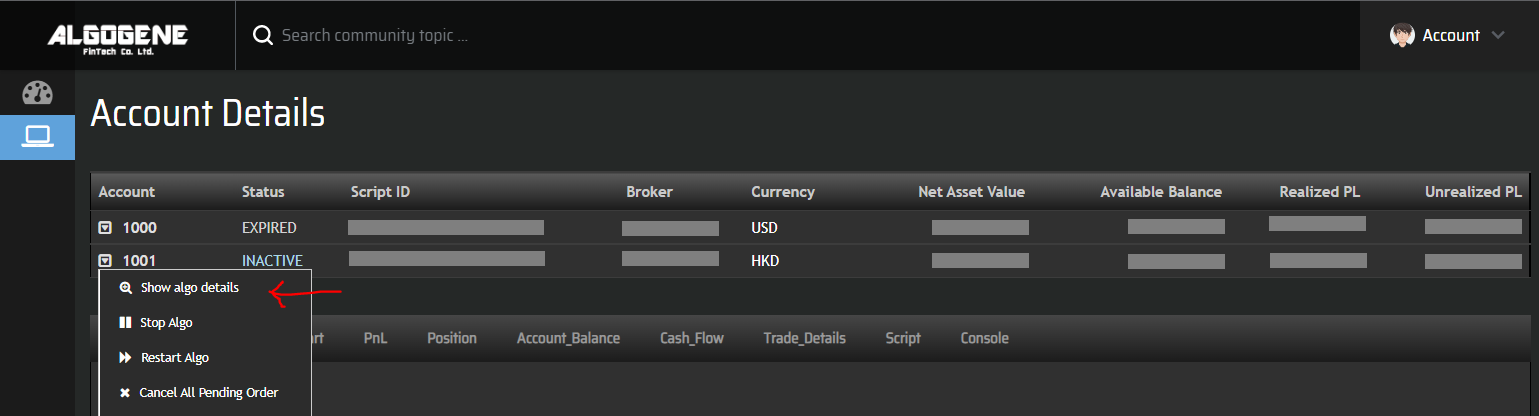
- Go to [Live Test] or [Real Trade] > [Account Details]
- Select a trading account and click "Show algo details"
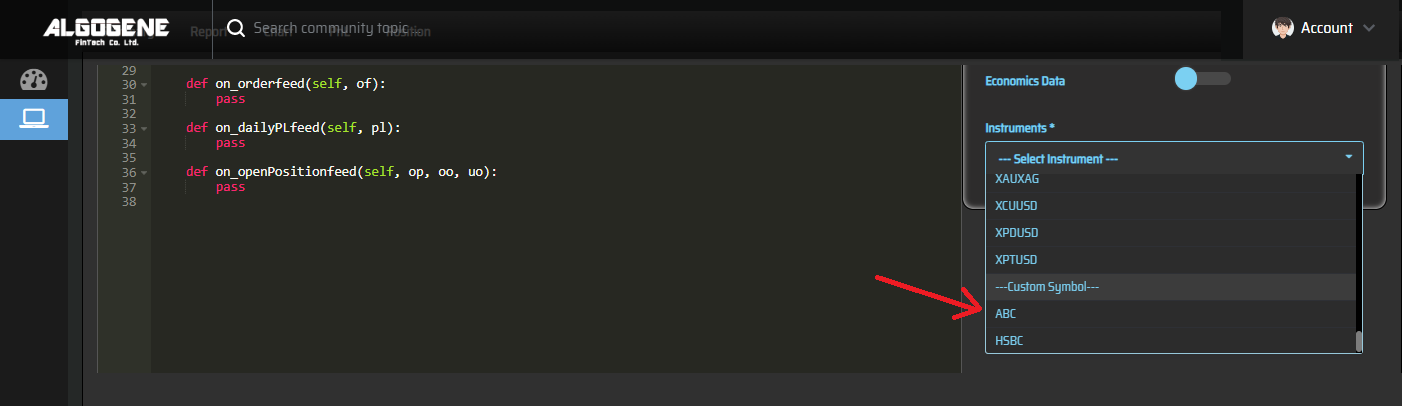
- Our "ABC" is now available under the instrument dropdown.
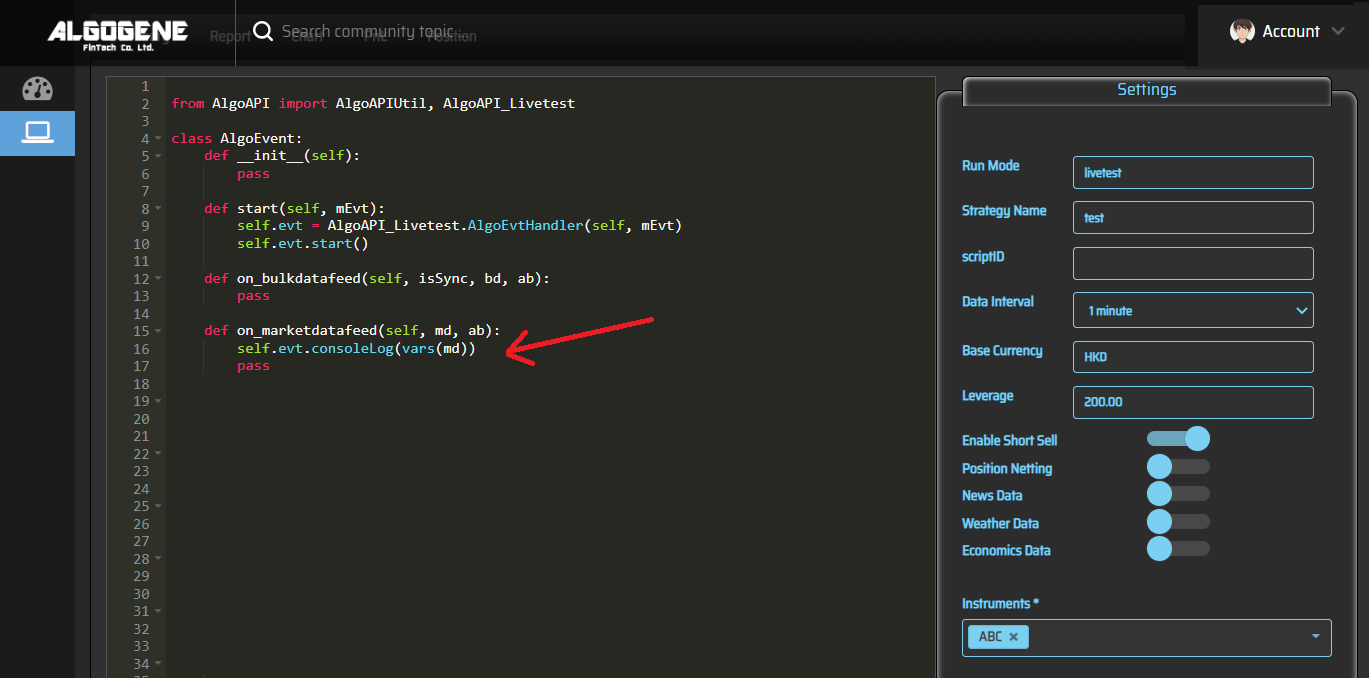
Data Stream
If there is new update in our custom data file "ABC", we will receive the market data feed under 'on_marketdatafeed' or 'on_bulkdatafeed.
Data Query
On the other hand, we can use the API function 'getHistoricalBar' to query from our custom data files.
