
ALGOGENE now supports users to trade with Bitget accounts using ALGOGENE dedicated trading gateway!
Open Bitget trading accounts through our partnership link, you will enjoy:
- Up to 2,820 USDT sign up bonus on Bitget
- Life-long 10% commission rebate on Bitget
- HK$300 free credits on ALGOGENE

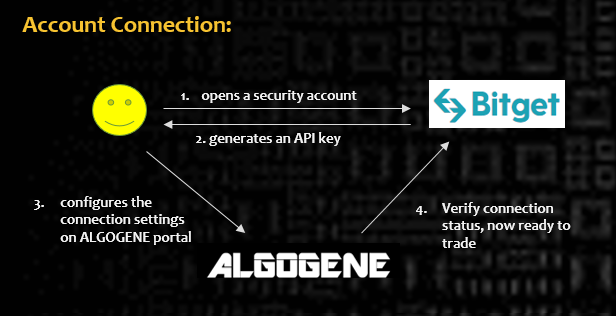
This article goes through the steps to connect ALGOGENE with your Bitget trading account. The overall workflow is summarized in this diagram.
Who is Bitget?
Bitget (https://www.bitget.com/) is a crypto exchange and digital assets trading platform headquarted in Singapore. As of the time of writing, Bitget ranks to be the top #10 cryptocurrency exchange by trading volume. It provides more than 500 cryptocurrencies for spot, perpetual, and future trading.
Client Onboarding on Bitget
- Sign up on Bitget
- From top right dropdown, click "ID Verification" and follow the instructions to complete the KYC process

Create Sub-account
It is advised to create multiple sub-accounts on Bitget to manage different trading strategies.
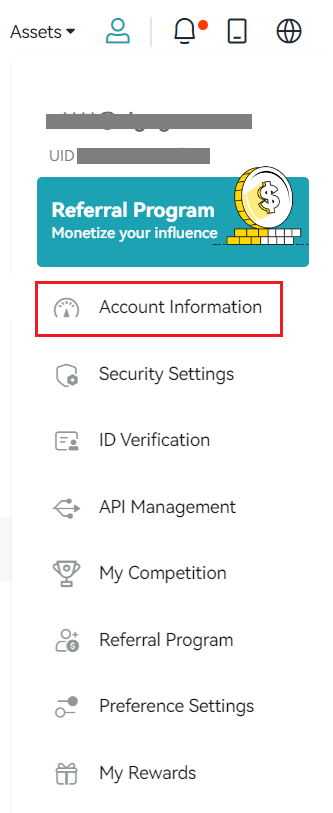
- From top right dropdown, click "Account Information"
- Click "Sub-account"
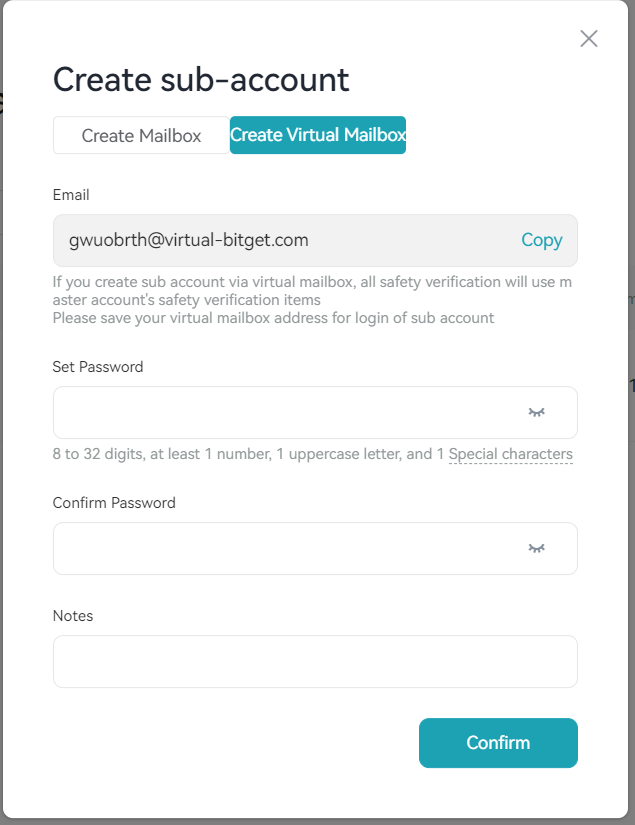
- Click "Create Sub-account"
- Set "Email" and Password", then click "Confirm"


Create API Key for Sub-account
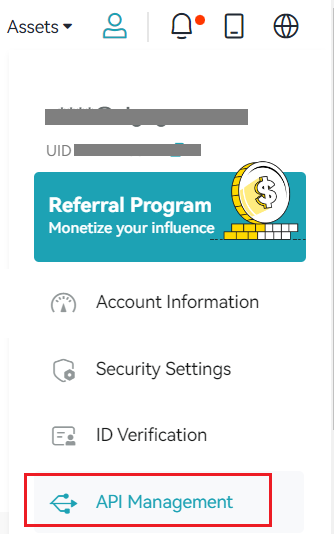
- From top right dropdown, click "Account Information"
- Click "Sub-account"
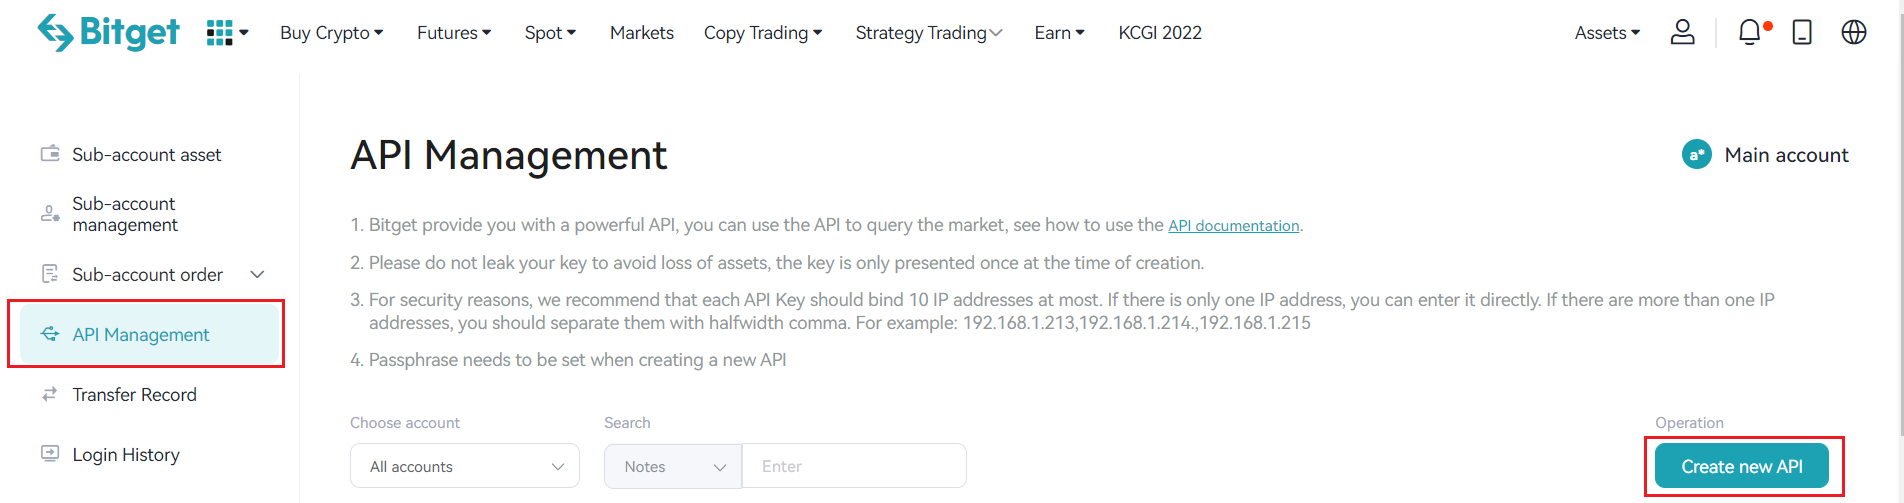
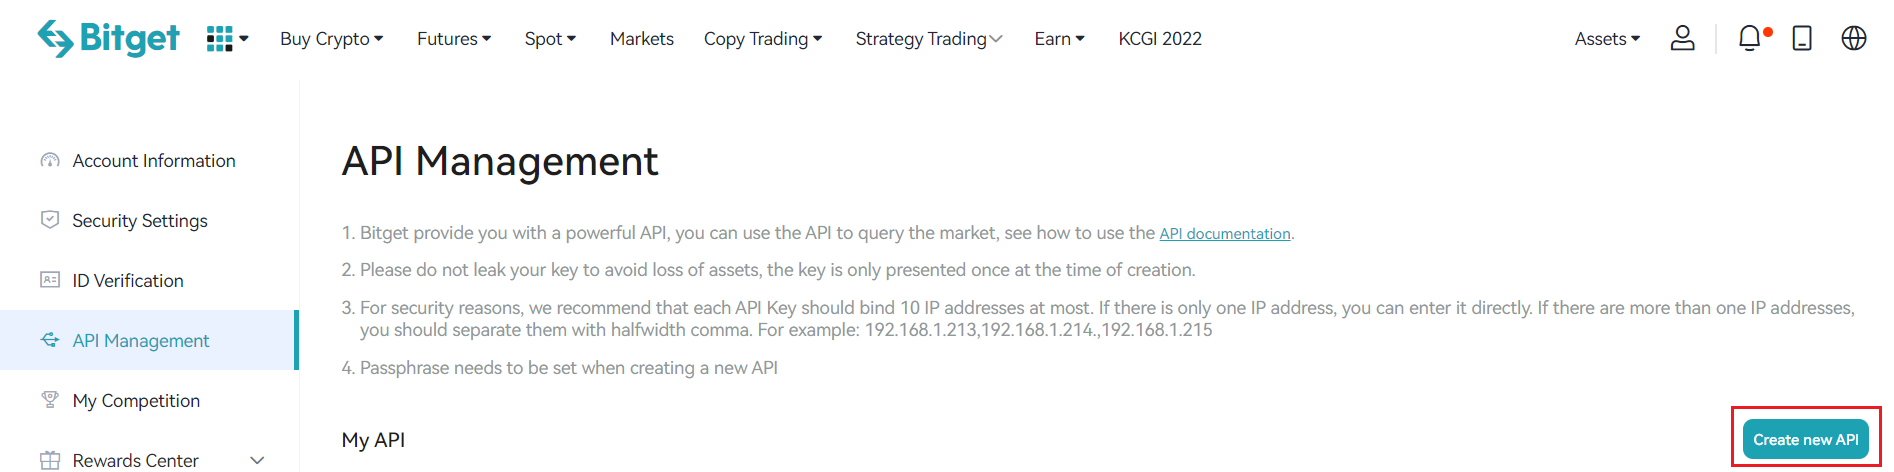
- In left panel, you should see it is showing sub-account info. Click "API Management" > "Create new API"
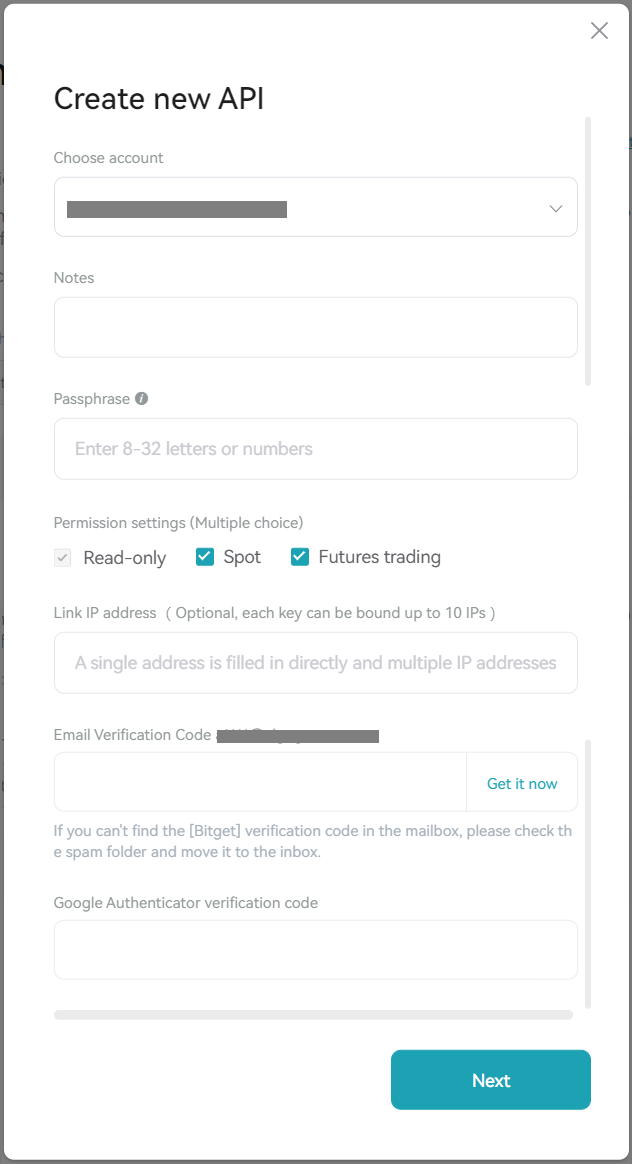
- Set up API key
- Choose which sub-account the API apply to
- Set a passphase for the API
- Enable Spot and Future trading
- "Link IP address" can be left empty
- Complete email verification, then click "Next"
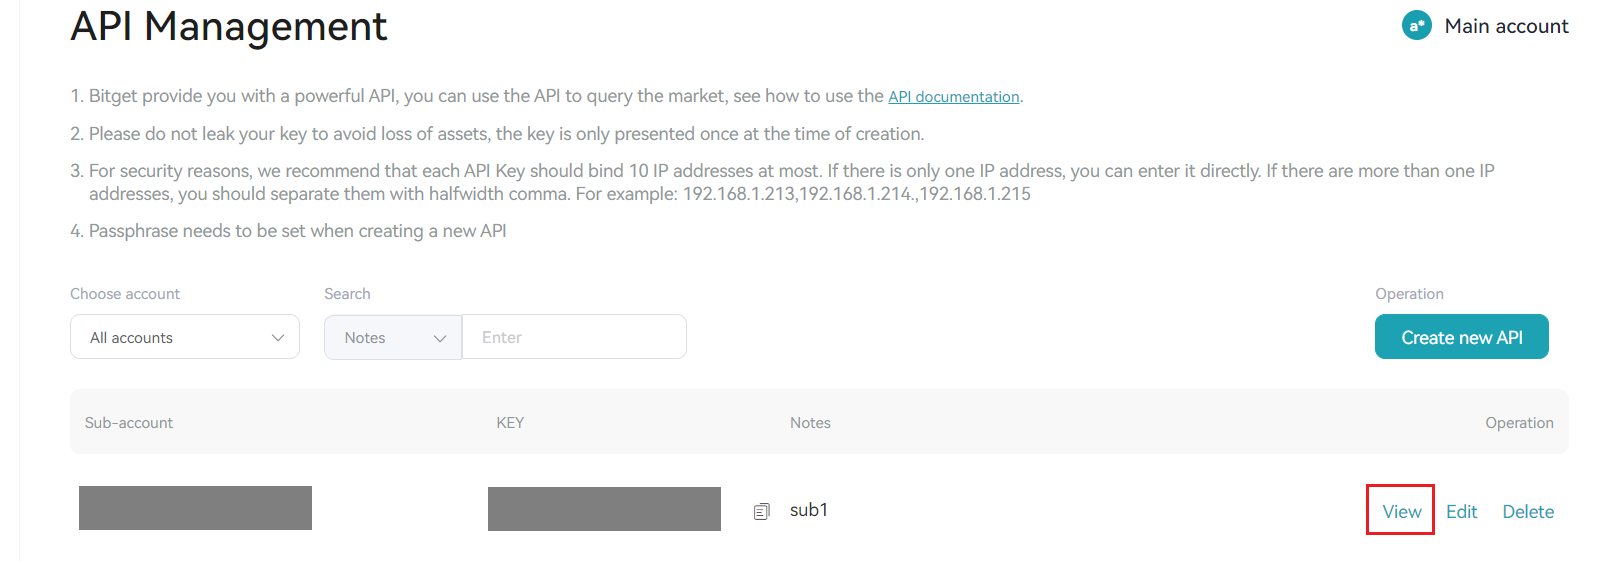
- Now, your API is created, click "View"
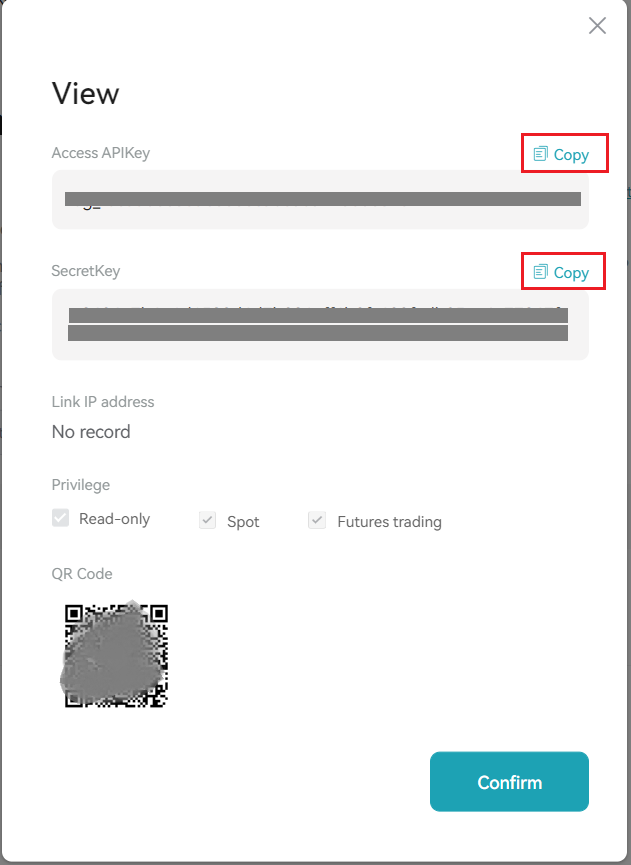
- Get your "API Key" and "API Secret"
Create API Key for main account (Optional)
Alternatively, you can create API for the main account as follows:
- From top right dropdown, click "API Management"
- click "Create new API"
- Follow similar procedures for sub-account API above
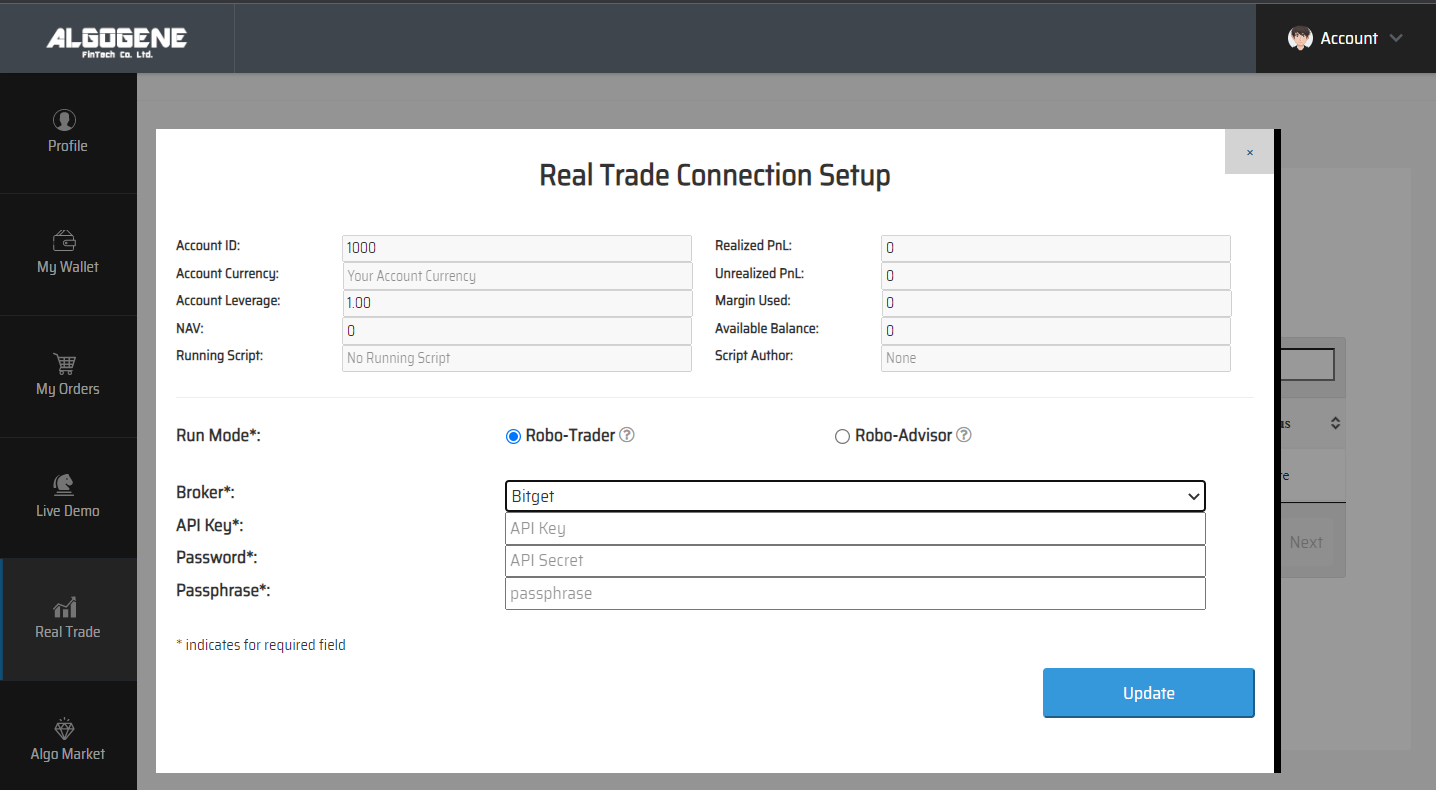
Config on ALGOGENE
- Login ALGOGENE portal
- Go to 'Settings' -> 'Trade Account'
- Select an ALGOGENE live-test or real-trade account depending on your case
- Choose "Bitget" in broker dropdown
- Update the connection settings as follows:
- "API Key" -> Your Bitget's API Key
- "Password" -> Your Bitget's API Secret
- "Passphase" -> Your Bitget's API Passphase

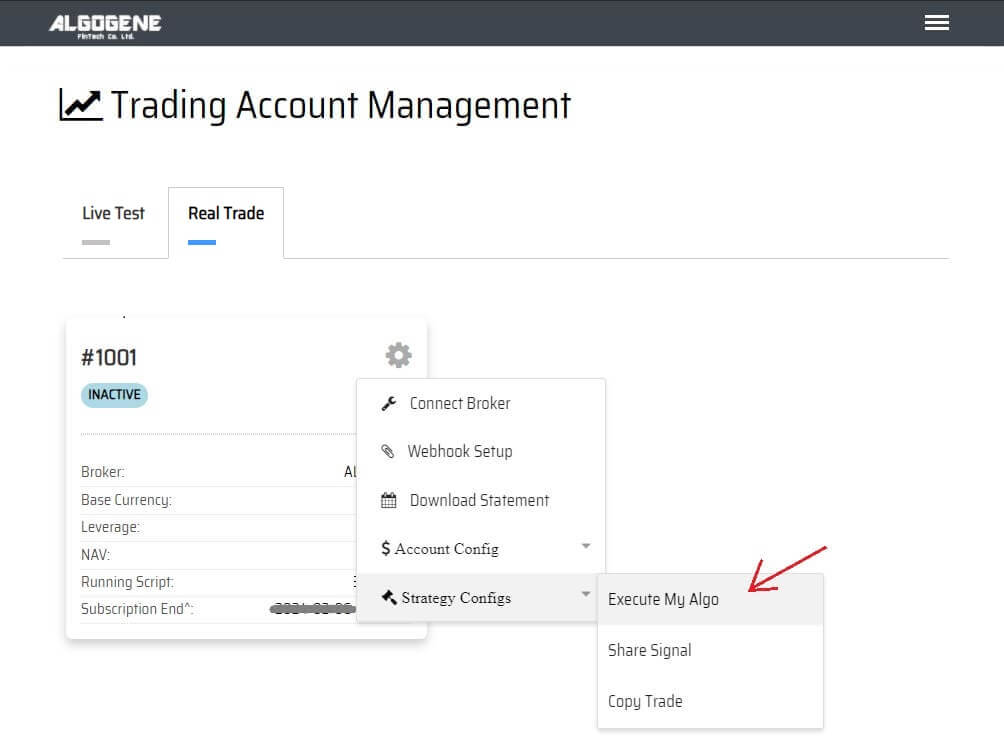
Deploy Algo
After successful connection from above, you are now ready to deploy and trade an Algo with Bitget.
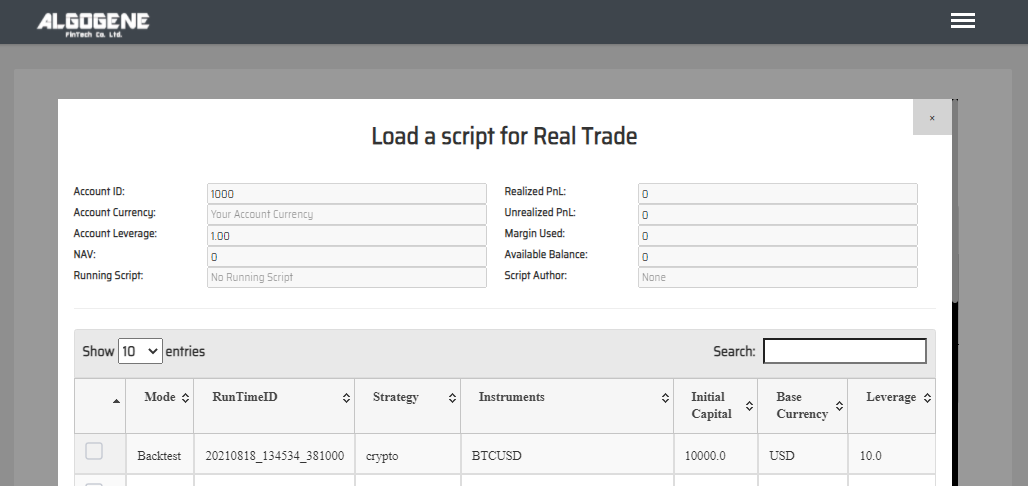
1. Deploy from a DIY script
- Under ALGOGENE 'settings', choose your Bitget linked account
- deploy any one of your backtested script
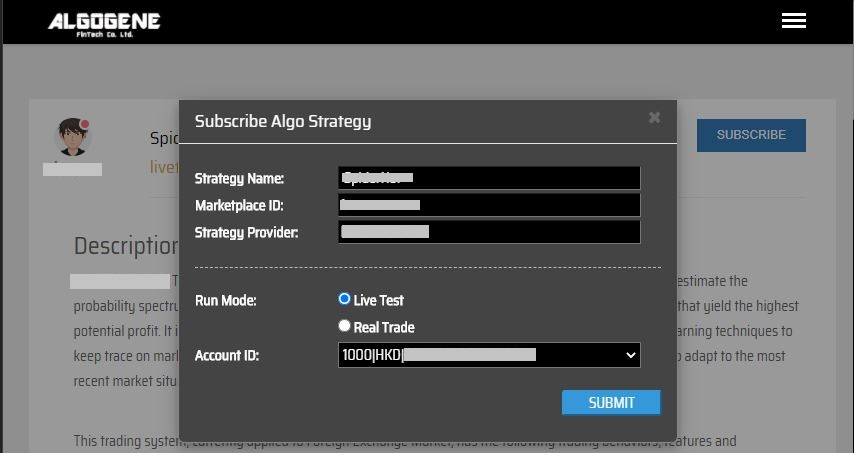
2. Deploy from algo marketplace subscription
- Explore available trading bots from ALGOGENE Marketplace
- Choose a desired trading bot, click "SUBSCRIBE"
- Select your desired "Run Mode" and "Account", then click "SUBMIT"
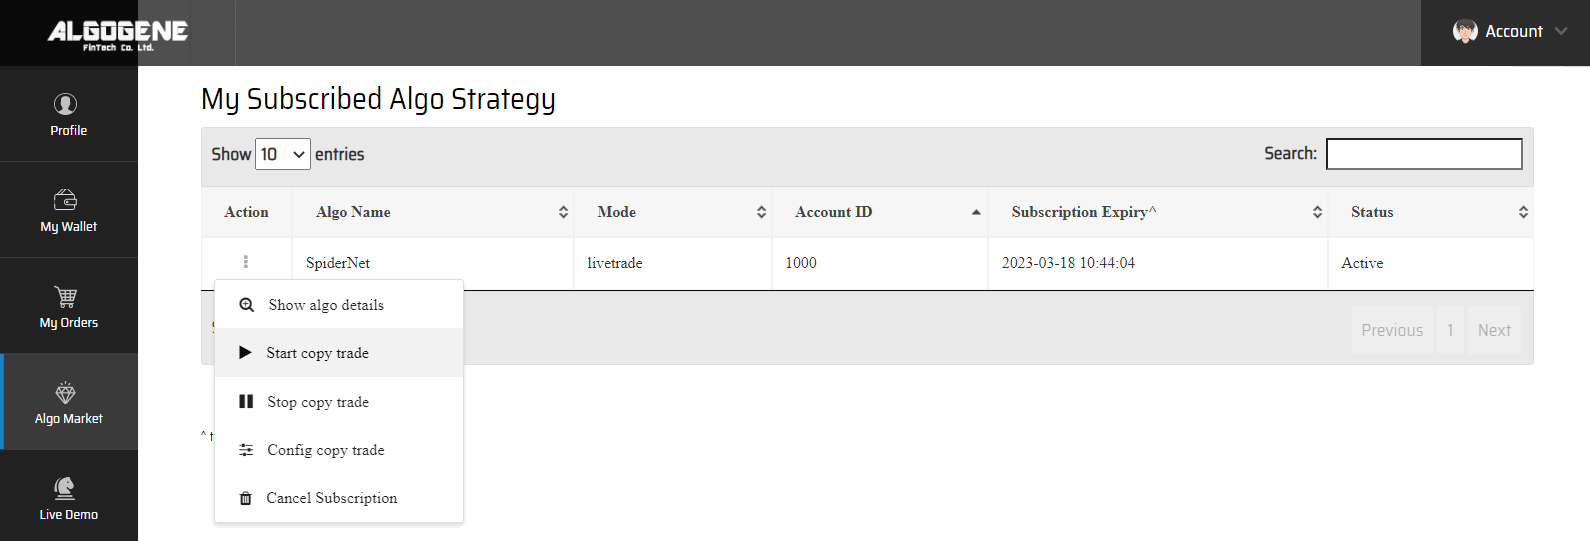
- Go to [Setting] > [Algo Market] > [My Subscribed Algo Strategy], you should see your subscribed Algo is active in trading for you. You have the feasibility to "Stop copy trade" and "Start copy trade" at any time.
Demo Video
Happy Trading! :)


